Identify And Classify Polygons
Subject: Math
Grade: Eighth grade
Topic: Two-Dimensional Figures
Please LOG IN to download the presentation. Access is available to registered users only.
View More Content
Exploring Polygons in Two-Dimensional Figures
– What are Two-Dimensional Figures?
– Shapes with width and height but no depth
– Recognizing shapes in our environment
– Everyday objects as examples: windows are rectangles, signs are octagons
– Today’s goal: Identify Polygons
– Define polygons and distinguish from other shapes
– Classifying Polygons by sides & angles
– Learn terms like ‘pentagon’ and ‘equilateral’
|
This slide introduces students to the concept of two-dimensional figures, emphasizing their lack of depth. Highlight the prevalence of these shapes in the students’ daily lives to make the topic relatable. The main focus is on identifying polygons, which are flat shapes with straight sides. Encourage students to recognize and name polygons they encounter every day. The classification of polygons will be based on the number of sides and types of angles they have. This foundational knowledge will be crucial for understanding more complex geometric concepts. Provide examples of different polygons and ask students to classify them as an interactive part of the lesson.
Exploring Polygons
– Define a polygon
– A shape with straight sides, closed, and has no curves
– Key characteristics of polygons
– Must have at least 3 sides, sides don’t cross, and are 2-dimensional
– Polygon examples
– Examples: Triangle, square, rectangle
– Non-examples of polygons
– Non-examples: Circle, shapes with curves or open sides
|
This slide introduces the concept of polygons to the students. Begin with the definition, emphasizing that polygons are 2-dimensional shapes with straight sides that are fully closed. Discuss the characteristics such as the number of sides, the fact that the sides do not cross, and that they are flat shapes. Provide clear examples of polygons like triangles, squares, and rectangles, and contrast these with non-examples such as circles and open shapes to solidify understanding. Encourage students to think of other examples and non-examples to discuss in class.
Classifying Polygons
– Polygons by sides number
– Triangles, quadrilaterals, pentagons, etc.
– Regular vs. Irregular
– Regular: all sides/angles equal. Irregular: not equal
– Convex vs. Concave
– Convex: no interior angles > 180°. Concave: at least one
– Class activity: Polygon Hunt
|
This slide aims to help students identify and classify polygons based on different properties. Start by explaining that polygons can be classified by the number of sides they have, from triangles (three sides) to n-gons (n sides). Then, distinguish between regular polygons, which have all sides and angles equal, and irregular polygons, which do not. Next, compare convex polygons, where all interior angles are less than 180 degrees and no sides cave in, to concave polygons, where at least one interior angle is greater than 180 degrees, resulting in a ‘caved-in’ side. For the class activity, have students find examples of each type of polygon either in the classroom, from a worksheet, or by drawing them. Provide guidance on how to identify each type and encourage group discussion to reinforce learning.
Angles in Polygons
– Interior vs. Exterior Angles
– Interior angles are inside shapes; exterior are outside.
– Calculating Interior Angle Sums
– Sum of interior angles: (n-2)×180°, where n is the number of sides.
– Angle Sum Property
– Each polygon type has a specific angle sum.
– Classifying Polygons by Angles
– Use angle sums to determine the type of polygon.
|
This slide introduces students to the concept of interior and exterior angles in polygons. Begin by explaining the difference between interior and exterior angles. Move on to the formula for calculating the sum of interior angles, which is (n-2)×180°, where n is the number of sides in the polygon. Discuss the angle sum property, which states that the sum of the interior angles of a polygon depends on the number of sides. Finally, show how these concepts help classify polygons into categories like triangles, quadrilaterals, pentagons, etc. Provide examples of different polygons and work through the process of calculating their interior angle sums to reinforce the concept.
Naming Polygons: From Triangle to Dodecagon
– Understanding polygon names
– Polygons are named based on the number of sides they have, from 3 (triangle) up to 12 (dodecagon).
– Prefixes: Key to polygon names
– Prefixes like ‘tri-‘ for three, ‘quad-‘ for four, help identify the number of sides.
– Practice with polygon examples
– Example: A pentagon has ‘penta-‘, meaning five sides.
– Classify by number of sides
– Knowing the prefixes, we can classify any polygon by its sides.
|
This slide introduces students to the concept of naming polygons based on their number of sides, using prefixes derived from Greek and Latin. Understanding these prefixes will enable students to identify and classify polygons from triangles (three sides) to dodecagons (twelve sides). The slide encourages practice with examples to reinforce learning. In the notes, provide additional examples and encourage students to create a chart of polygons with their names and corresponding prefixes for reference. This will serve as a foundation for recognizing and describing polygons in geometry.
Identifying and Classifying Polygons
– Define characteristics of polygons
– Polygons are 2D shapes with straight sides
– Classroom activity: Find polygons
– Students will search and identify polygons in the classroom
– Discuss polygons in real life
– Everyday objects like tables, signs, are polygons
– Classify polygons by attributes
|
Begin the lesson by defining polygons and their characteristics, such as being two-dimensional shapes with straight sides that are fully closed. During the group activity, have students look around the classroom to find and identify various polygons, such as the shape of a door (rectangle), a clock (circle, which is not a polygon), or a window (square). Discuss how polygons are present in everyday life and can be identified in many objects we use or see daily. Encourage students to classify the polygons they find by their attributes, such as the number of sides or angles. This will help them understand the practical application of geometry in their surroundings. Provide detailed guidelines for the teacher to facilitate the activity, suggesting that students work in small groups and record their findings to share with the class.
Classifying Polygons
– Steps to classify polygons
Count the sides and angles, check for equal sides/angles.
– Classify polygons as a class
Use examples like triangles, quadrilaterals, pentagons.
– Worksheet for individual practice
Apply the classification steps to practice problems.
– Understanding polygon properties
|
This slide is aimed at teaching students the process of classifying polygons. Begin by explaining the steps to classify a polygon, which include counting the number of sides and angles, and checking for congruency in sides and angles. Then, as a class, work through examples of different polygons, such as triangles, quadrilaterals, and pentagons, discussing their properties and how they fit into categories. Provide a worksheet for individual practice, where students can apply what they’ve learned to classify various polygons. This will help reinforce their understanding of the properties that define each type of polygon. Encourage students to ask questions during the practice to ensure they grasp the concept.
Polygon Challenge: Create and Classify
– Craft your own polygon
– Ensure at least 5 sides
– Polygons must be closed figures with straight lines
– Share polygons with the class
– Classify your classmates’ shapes
– Determine if they are regular or irregular, concave or convex
|
This class activity is designed to engage students in understanding polygons by creating their own. Students must use their knowledge of polygons to draw a shape with at least five sides, which could be regular (all sides and angles equal) or irregular. After creation, students will share their polygons with the class and work together to classify each other’s shapes. This will help them to identify properties of polygons such as regularity, concavity, and convexity. The activity promotes collaboration and practical application of geometric concepts. Provide students with paper, rulers, and protractors for precise construction. Encourage creativity and ensure that they understand the classification criteria.
Review and Reflect: Polygons
– Recap: Identifying Polygons
– Discuss your favorite polygon
– Share which polygon intrigues you and the reasons behind your choice.
– Preview: Triangle & Quadrilateral Properties
– Next lesson will cover sides, angles, and other characteristics.
– Reflect on today’s learning
|
This slide aims to consolidate the day’s learning on polygons, stimulate student engagement through personal reflection, and set the stage for the upcoming lesson. Begin with a brief recap of how to identify and classify polygons, ensuring students can distinguish between different types. Encourage an interactive discussion where students express their interest in a particular polygon and explain their reasoning, which can include aspects like symmetry, complexity, or real-world applications. Provide a sneak peek into the next lesson, highlighting that we will delve into the specific properties of triangles and quadrilaterals, such as side lengths, angle measures, and parallel sides. Conclude by asking students to reflect on what they’ve learned and how they can apply this knowledge.
Exit Ticket: Polygon Classification Quiz
– Quick quiz on polygons
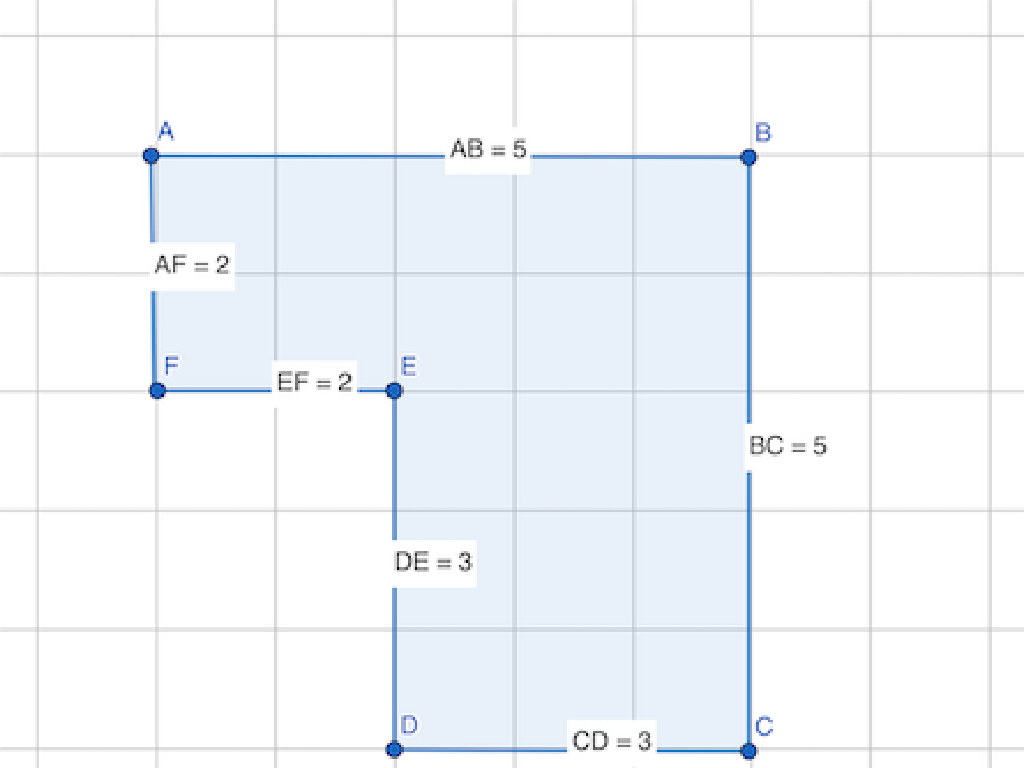
– Identify the polygon shown
– Look at the number of sides and angles
– Classify the type of polygon
– Determine if it’s regular or irregular
– Submit answers before exit
|
This slide is for a quick assessment at the end of the class to evaluate students’ understanding of polygons. The quiz will consist of various images of polygons that students must identify and classify based on their attributes such as the number of sides and angles. Students should be reminded of the difference between regular (all sides and angles equal) and irregular polygons. Encourage students to use the terminology learned during the lesson. Possible activities include identifying polygons in real-life objects, classifying given shapes on a worksheet, or creating their own polygons with specific characteristics. Collect the answers before students leave to assess their grasp of the material covered in class.

